⚙️ Settings Guide
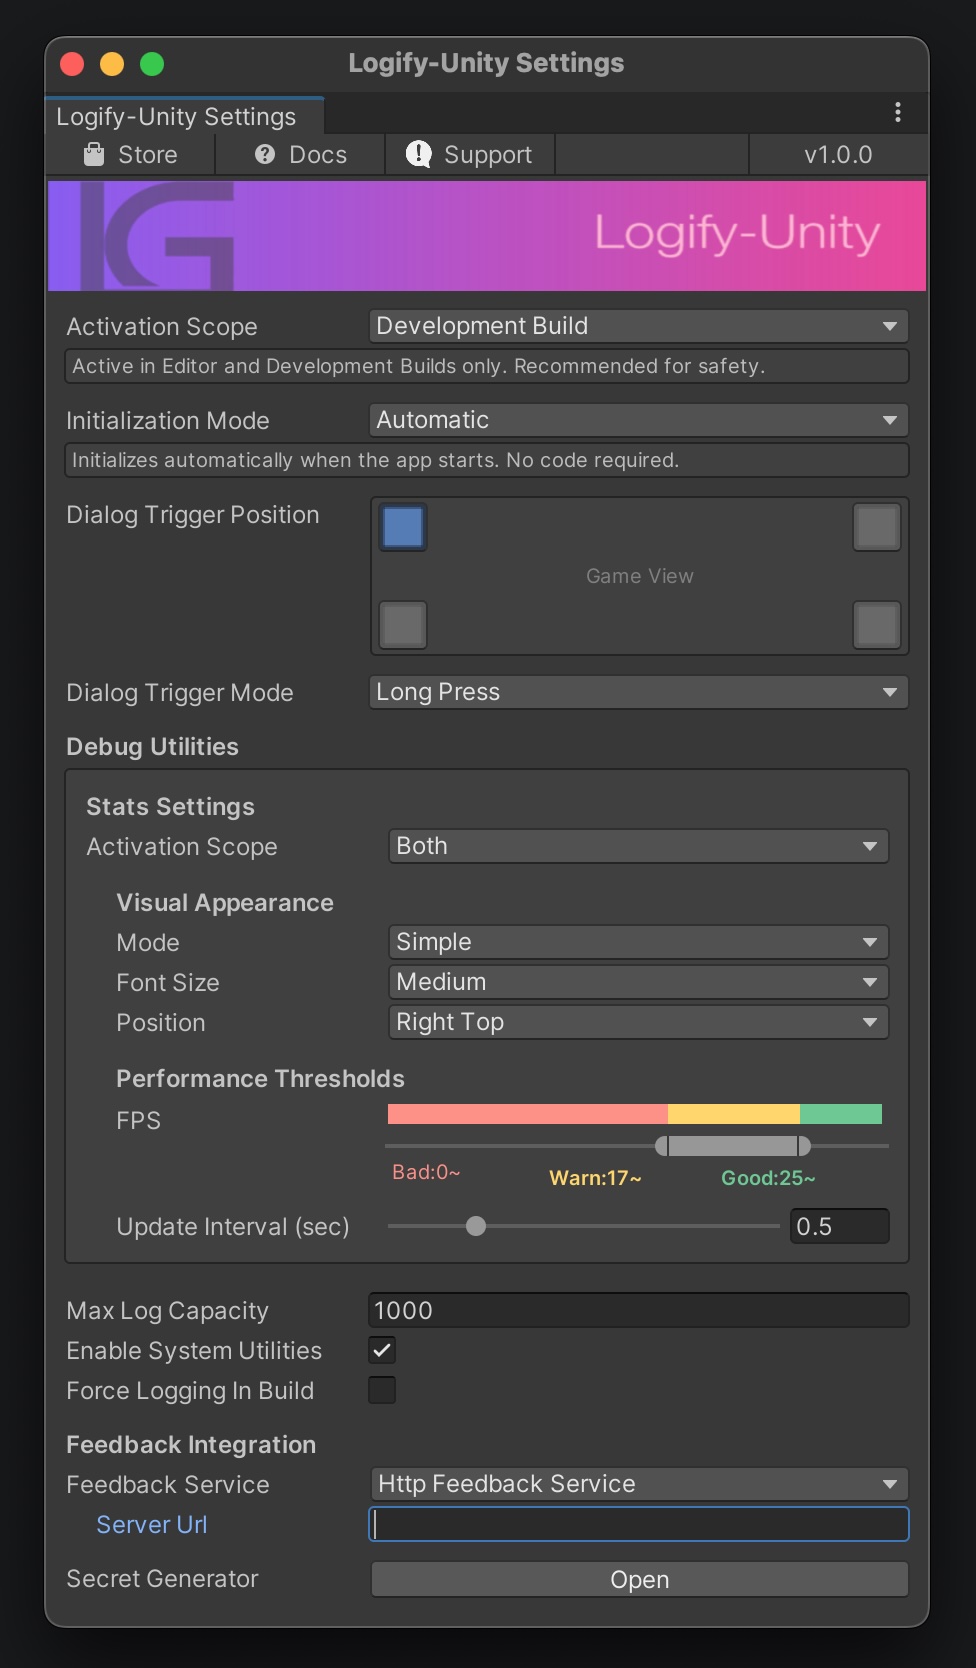
The behavior of this plugin can be centrally managed from Window > Logify-Unity > Settings in the Unity Editor.
🛠️ General Settings
Controls when the plugin is activated across the entire application.
| Setting | Description |
|---|---|
| Activation Scope | Select the build environment where Logify should operate. Choose carefully when including in release builds. Default is Development Build. |
| Initialization Mode | Automatic is recommended. Automatically initializes when scenes load. Select Manual if you want to control initialization timing manually and call Logi.Initialize(). Default is Automatic. |
🖱️ Dialog Trigger
Configure how users invoke the feedback screen.
- Dialog Trigger Position: Choose the transparent trigger button placement from the screen's four corners.
- Dialog Trigger Mode: Select the trigger response mode.
- Long Press: Recommended (default) to prevent accidental activation.
- Tap: Activate with a simple tap.
Preview
When the Game Window is displayed, clicking on the Trigger Position allows you to confirm the location.
📊 Debug Utilities
Display real-time performance statistics (Stats) on screen.
Stats Settings
Visual Appearance:
- Mode: Toggle between
Simple(FPS/memory only) and detailed display - Font Size / Position: Adjustable to match your device resolution during development
Performance Thresholds:
- Set thresholds that change colors (Red/Yellow/Green) according to FPS values
System Utilities
- Max Log Capacity: Maximum number of Console Logs retained in memory
- Force Logging In Build: Controls whether to forcibly collect logs even in non-development builds
🔗 Feedback Integration
The most important section that determines where collected data is sent.
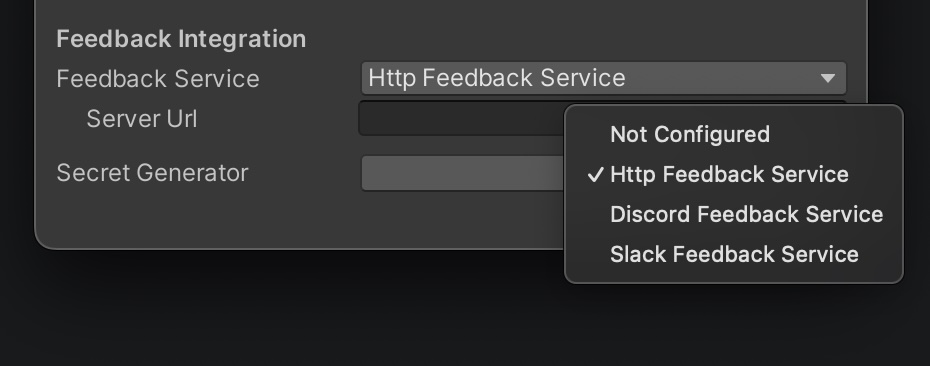
Feedback Service
Select the destination protocol.
- Http Feedback Service: Send via your own PHP server.
- Discord / Slack Feedback Service: Send directly to each service in a self-contained manner.
Secret Generator
Opens a dedicated window to safely obfuscate important information (Webhook URLs and Shared Secrets).