⚙️ PHP Server Setup and Operations
This configuration is recommended when distributing apps to unspecified users or when requiring higher security (authentication/rate limiting) and email integration.
📋 System Requirements
- PHP 7.4 or higher
- HTTPS environment required (SSL communication must be established)
- SQLite3 support (most standard rental servers have this enabled)
🚀 Server Deployment
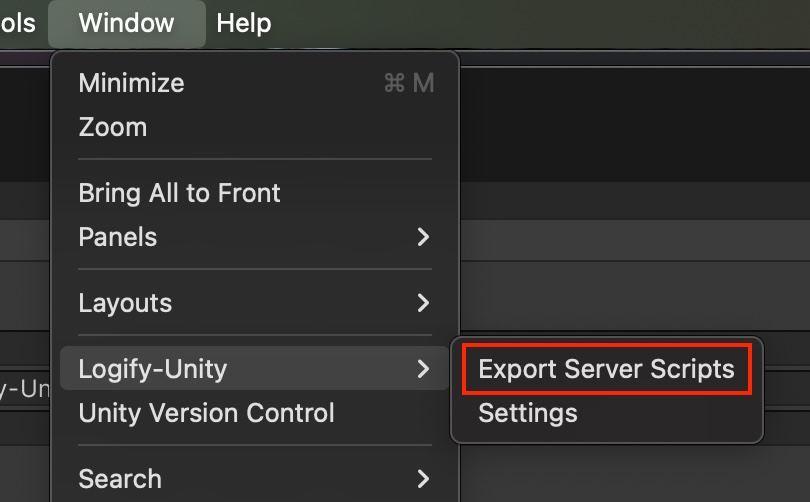
1. Export Scripts
Select Window > Logify-Unity > Export Server Script from Unity Editor menu and output the PHP file set to any location.
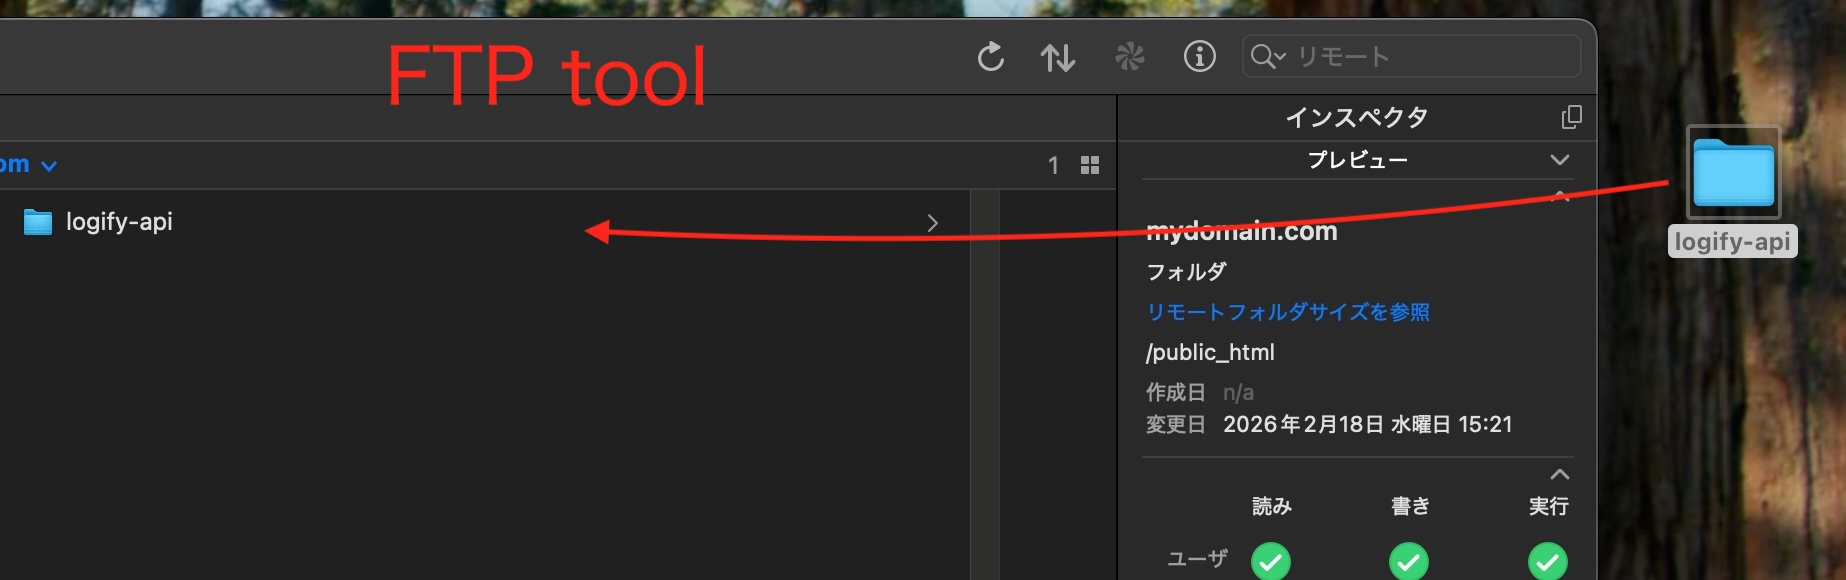
2. Upload to Server
Upload the output folder (e.g., logify-api) as-is to the server.
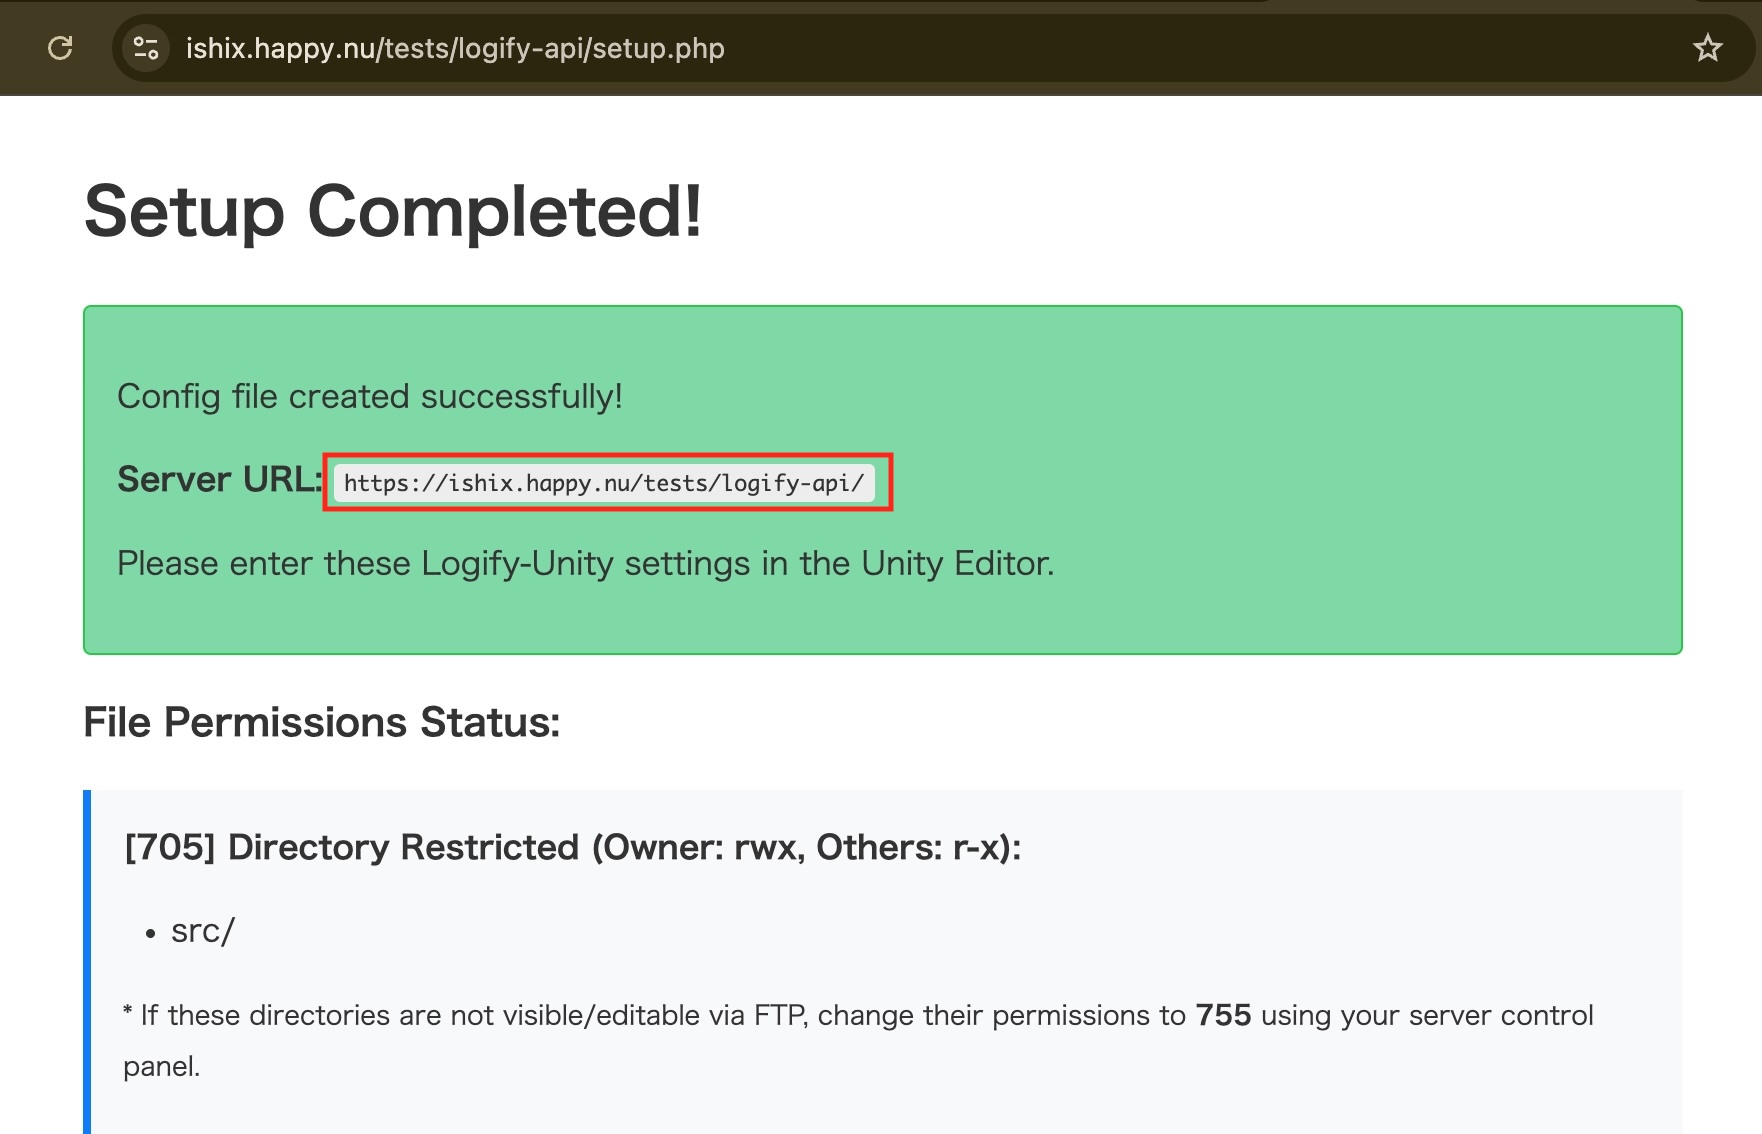
3. Run Setup
Access setup.php in browser.
(e.g., https://yourdomain.com/logify-api/setup.php)
This script automatically performs the following:
- Creates data storage directory (
data/) - Sets appropriate permissions (
chmod) - Generates
.htaccessfor security protection - Generates initial configuration file (
config.php)
Setup Complete Screen
Be sure to save the Server URL displayed on screen. You'll use it in Unity settings.
For security, we recommend manually deleting setup.php from the server after completion.
🛠️ Unity Setup
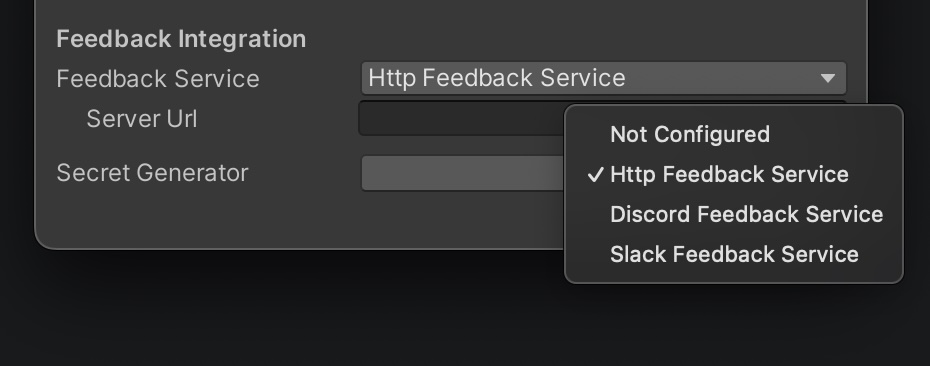
1. Select Service and Set URL
Open Window > Logify-Unity > Settings and select HTTP Feedback Service for Feedback Service.
- Server Url: Enter the URL you saved earlier.
2. Enter Connection Information
- Secret Generator: Click
Opento open the generation window, then execute ①Generate. - ②Save the Shared Secret value as you'll need it for the next server configuration.
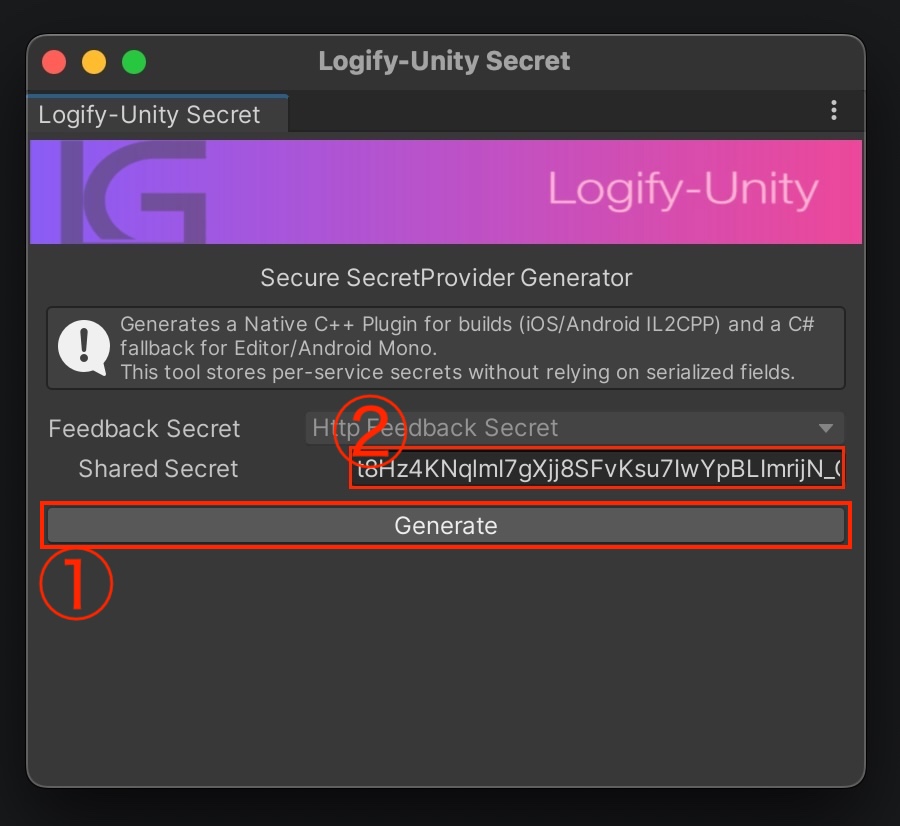
Executing Generate automatically generates obfuscated C++ code and C# Bridge code. This significantly reduces the risk of extracting the Webhook URL from the binary after build.
To enable protection via C++ plugin, set Scripting Backend to [IL2CPP] in Unity's Build Settings before building.
- iOS / Android (IL2CPP): Generated Native C++ Plugin is used, providing strong protection
- Editor / Android (Mono): Automatically generated C# fallback code is used for compatibility
⚙️ Detailed Server Configuration
Immediately after setup completion, config.php has all notification features set to false (disabled) for safety. Testing will not receive notifications unless you complete the following steps.
1. Link Shared Secret
Open config.php on the server and enter the Shared Secret generated on Unity side. Requests that don't match this will be rejected by the server.
2. Enable Services and Set Tokens
Change the enabled of services you want to use to true and enter necessary information. Refer to each guide below to obtain configuration information.
- 🤖 Discord Integration: How to get Webhook URL
- 💬 Slack Integration: How to get OAuth token and channel ID
- 📧 Email Integration: Setting recipient/sender addresses
Configuration Example (config.php)
Enable Discord
return [
    //1. [Required] Enter Shared Secret generated on Unity side
    'shared_secret' => 't8Hz4KNqlmI7gXjj8SFvKsu7IwYpBLImrijN_CKieak',

    'services' => [
        'discord' => [
            'enabled'     => true, // Enable by changing to true
            'webhook_url' => 'https://discord.com/api/webhooks/...' // Enter per guide
        ],
        'slack' => [
            'enabled' => false, // Change to true to use
            'token'   => '',    // xoxb-...
            'channel' => ''     // C...
        ],
        'email' => [
            'enabled' => false, // Change to true to use
            'to'      => '',
            'from'    => '',
        ],
    ],
    // ...
];
Checking Configuration File
When setup.php executes successfully, config.php is automatically generated in the directory.
When using FTP clients (FileZilla, etc.), newly generated files may not appear in the list due to caching. Execute "Refresh" to verify.
Depending on server environment, files generated by PHP scripts may have ownership set to "execution user (apache/www-data, etc.)", restricting FTP operations.
In that case, open the server's control panel (file browser) and change the target file's permissions to 644 before editing.
After editing files, don't forget to save (upload) the changes. If not saved, settings won't apply and testing will fail.
🧪 Testing
Once setup is complete, test whether feedback is actually received.
- Run app following Testing Procedure.
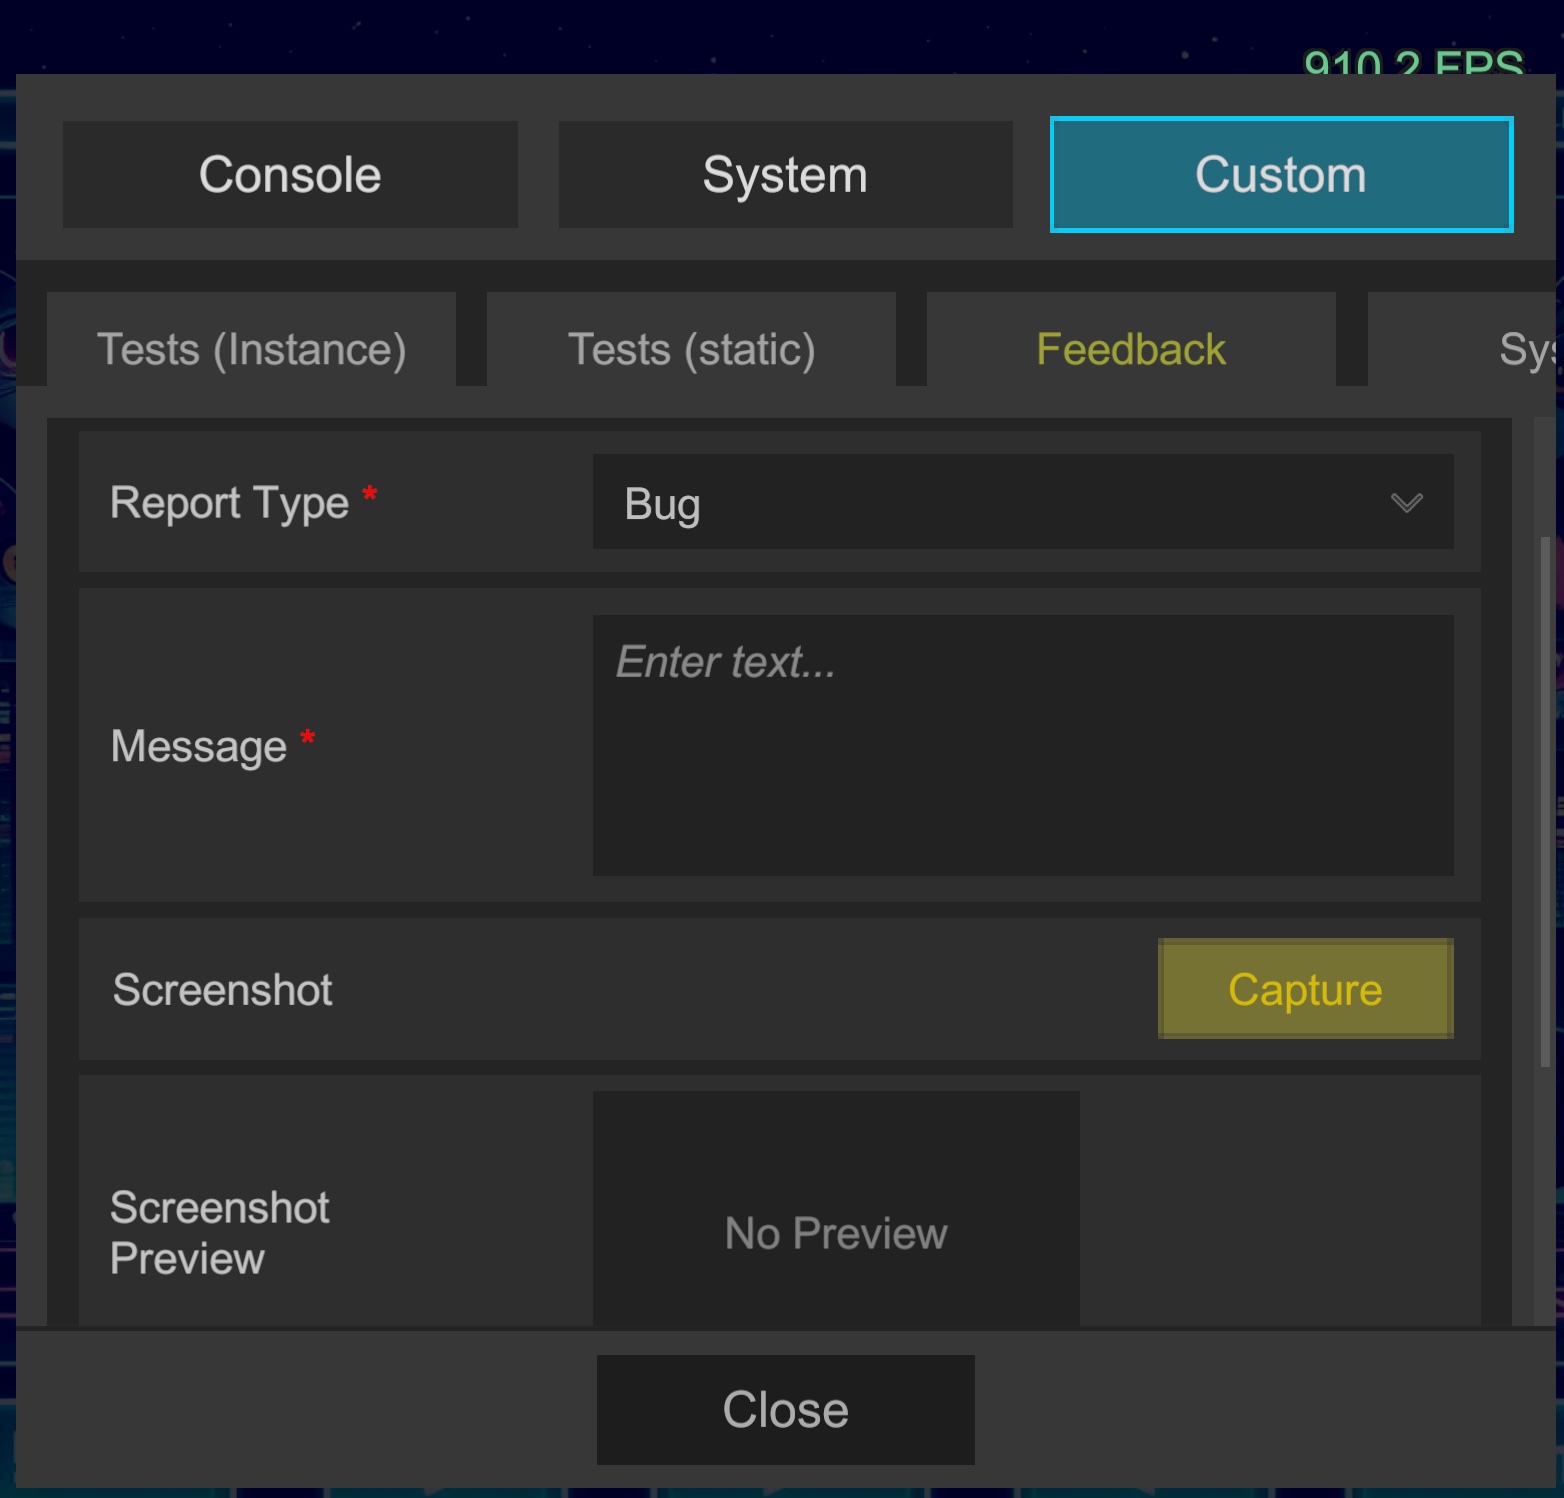
- Submit from in-game Custom > Feedback tab.
- Success if notifications arrive at designated service (Discord/Slack/Email).
🛡️ Operations and Troubleshooting
1. Blocking Malicious Users (Blacklist)
To manually reject specific IP addresses or Reporter ID, add one per line to data/blacklist_???.txt.

2. Checking Access Reports
Access report.php to check current submission counts and block status.
Add the secret_key generated in config.php to URL end.
- URL example:
https://yourdomain.com/logify-api/report.php?key=xxxx
Output summary is saved to data/__database_???.txt.
=== Logify Access Report (Generated: 2026-02-18 15:39:06) ===
Reporter ID                              | IP / Identifier (Full Hash) | Count | Last Request
---------------------------------------------------------------------------------------------------
d115e86e-ca84-4431-8781-06240224d72b     | 888.50.222.281              | 1     | 2026-02-18 15:33:17

=== Auto Blocked Clients ===
Reporter ID   | IP    | Active     | Blocked Until       | Last Violation      | Reason
----------------------------------------------------------------------------------------
...

3. Debug Logs
If submission fails or server error (500) occurs, check data/debug_???.log. Detailed stack traces are recorded.
4. Advanced Settings (Rate Limit / Auto Block)
Strengthen countermeasures against brute force attacks and continuous submissions by adjusting values in config.php.
rate_limit: Submission frequency per user (e.g., up to 3 times per hour).auto_block: Automatically isolates users sending large volumes of violation requests in short periods for a set duration.